Workload-based Web Application Firewall (WAF)
This feature is tech preview. Tech preview features may be subject to significant changes before they become GA.
Big picture
Protect cloud-native applications from application layer attacks with Calico Cloud Workload-based Web Application Firewall (WAF).
Value
A web application firewall (WAF) protects web applications from a variety of application layer attacks such as cross-site scripting (XSS), SQL injection, and cookie poisoning, among others. Given that attacks on apps are the leading cause of breaches, you need to protect the HTTP traffic that provides a gateway to valuable app data.
Historically, web application firewalls (WAFs) were deployed at the edge of your cluster to filter incoming traffic. Our workload-based WAF solution takes a unique, cloud-native approach to web security by allowing you to implement zero-trust rules for workloads inside your cluster.
Calico Cloud WAF allows you to selectively run service traffic within your cluster, and protect intra-cluster traffic from common HTTP-layer attacks such as SQL injection, and cross-site request forgery. To increase protection, you can use Calico Cloud network policies to enforce security controls on selected pods on the host.
In addition to protecting against application layer attacks, any blocked HTTP requests will be logged and available in Elasticsearch for review. You can also set globalAlerts to be triggered based on these logs.
Features
This how-to-guide uses the following Calico Cloud features:
- Application Layer resource
Concepts
About Calico Cloud WAF
With Calico Cloud WAF, you gain visibility into internal east/west traffic at the HTTP layer in Manager UI Service Graph, Kibana, and Alerts page.
Calico Cloud WAF implementation
Calico Cloud WAF is deployed in your cluster as an Envoy daemonset. Calico Cloud proxies selected service traffic through Envoy, checking HTTP requests using the industry-standard ModSecurity module.
Before you begin
Not supported
- Windows
- eBPF dataplane
- RKE and RKE2 clusters
Limitations
- WAF is not supported for host-networked client pods
- When selecting and deselecting traffic for WAF, active connections may be disrupted
Required
Configure Felix for syncing WAF policy. Note: this is the same step required for L7 log collection so you may already have this set.
Enable the Policy Sync API in Felix. To do this cluster-wide, modify the default FelixConfiguration to set the field policySyncPathPrefix to /var/run/nodeagent:
kubectl patch felixconfiguration default --type='merge' -p '{"spec":{"policySyncPathPrefix":"/var/run/nodeagent"}}'
How to
Configure a cluster for WAF
Step 1: Configure ApplicationLayer CRD
Create or update the ApplicationLayer resource to include the webApplicationFirewall section of the file. Ensure value of the field is set to Enabled.
Example:
apiVersion: operator.tigera.io/v1
kind: ApplicationLayer
metadata:
  name: tigera-secure
spec:
  webApplicationFirewall: Enabled
Step 2: Select traffic for WAF
Annotate the services you wish to enable WAF for as shown.
kubectl annotate svc <service-name> -n <service-namespace> projectcalico.org/l7-logging=true
To disable WAF for the service, remove the annotation.
kubectl annotate svc <service-name> -n <service-namespace> projectcalico.org/l7-logging-
Step 3: Test your installation
To test your installation, you must first know the URL to access services. The URL can be either of the following:
- The external address of your cluster/service
- The cluster IP of your application's service (if testing within the cluster).
After identifying the URL, curl your service with a command to trigger an OWASP rule. This is a simple example of potential SQL Injection attack:
curl http://<host>//test/artists.php?artist=0+div+1+union%23foo*%2F*bar%0D%0Aselect%23foo%0D%0A1%2C2%2Ccurrent_user
In the l7-log-collector pods, you should notice a warning log when the attack triggered:
level=warning msg="WAF Process Http Request [2f435aca-4a3e-4f96-a7b2-a60c9745bd7b] URL '/test/artists.php?artist=0+div+1+union%23foo*%2F*bar%0D%0Aselect%23foo%0D%0A1%2C2%2Ccurrent_user' OWASP Warning'[2] Host:'10.224.0.38' File:'/etc/modsecurity-ruleset/REQUEST-942-APPLICATION-ATTACK-SQLI.conf' Line:'45' ID:'942100' Data:'' Severity:'0' Version:'OWASP_CRS/3.3.2' Message:'Warning. detected SQLi using libinjection.''"
To enable seeing WAF logs in Kibana and Manager UI, see the Seeing WAF events in Kibana and Manager UI section.
Add and edit rules
The OWASP Core Rule set that is bundled with Calico Cloud WAF, has reasonable defaults to get started.
ModSecurity provides the following rule sets and options:
- DetectionOnly Allows all traffic to pass, regardless of action specified. However, potentially malicious traffic warning(s) are returned from ModSecurity and logged accordingly with the OWASP violation details.
- On or Off Denies all traffic if the SecAction is set to "deny" or "drop". However "block" traffic is not denied or dropped - this is slightly counter-intuitive.
In case of an error, HTTP request will return HTTP 403 Response Code from Envoy to the originating service.
| Action | Description | Disruptive? |
|---|---|---|
| Block | Despite the name, this will not block or drop the request. ModSecurity will return detection=0 in this case and Calico will not log the event in Elasticsearch. | No |
| Deny | Denies HTTP traffic as ModSecurity will return detection=1 and will log the event in Elasticsearch. | Yes |
| Drop | Denies HTTP traffic as ModSecurity will return detection=1 and will log the event in Elasticsearch. | Yes |
Add or edit a rule set
Create a directory, and download the core rules set files that you want to use, for example:
mkdir my-ruleset && cd my-ruleset
curl -O https://raw.githubusercontent.com/coreruleset/coreruleset/v3.3/dev/rules/REQUEST-942-APPLICATION-ATTACK-SQLI.conf
Note: For completeness, it is a good practice to download these bootstrapping configuration files (Reference).
curl -O https://raw.githubusercontent.com/lsgroup/SmartReverseProxy/master/modsecdefault.conf
curl https://raw.githubusercontent.com/coreruleset/coreruleset/v3.3/dev/crs-setup.conf.example > crs-setup.conf
The two bootstrapping files modsecdefault.conf and crs-setup.conf MUST be named lowercase i.e. lowercase "m" and lowercase "c" respectively in order to ensure they are loaded into ModSec before any REQUST-*.conf Core Rules Set files. Presence of these two files is required and enforced by the operator.
Change your current directory to the my-ruleset folder where your core rules set files live. Create a configMap containing all the files downloaded into your new directory and replace the existing rule set with it:
kubectl create cm --dry-run=client --from-file=. -o yaml -n tigera-operator modsecurity-ruleset > ../my-ruleset.yaml
kubectl replace -f ../my-ruleset.yaml
Seeing WAF events in Kibana and Manager UI
In order for logs to be pushed and seen in Kibana and Manager UI, core rulesets have to be modified to deny or drop traffic. When WAF is configured in the cluster by default, modsecurity rules are programmed in the l7-log-collector to log a warning but not deny or drop the traffic.
Follow the section in Add or edit a rule set to download the bootstrap files, and update your rule sets to deny instead of block (pass) traffic.
For example, modify the modsecurity core rulesets' SecDefaultAction to deny rules by commenting and uncommenting these sections in the crs-setup.conf, which will change the SecDefaultAction from pass to deny with a 403 response.
Comment
 SecDefaultAction "phase:1,log,auditlog,pass"
 SecDefaultAction "phase:2,log,auditlog,pass"
Uncomment
SecDefaultAction "phase:1,log,auditlog,deny,status:403"
SecDefaultAction "phase:2,log,auditlog,deny,status:403"
Switching to deny means it will stop processing the request and return a 403 forbidden error when a rule is triggered. All denied traffic in this case means any HTTP request will return HTTP 403 Response Code from Envoy to the originating service like below:
root@waf-attacker-1234:/ curl http://<host>//test/artists.php?artist=0+div+1+union%23foo*%2F*bar%0D%0Aselect%23foo%0D%0A1%2C2%2Ccurrent_user -v
*   Trying 10.0.40.16:80...
* Connected to 10.0.40.16 (10.0.40.16) port 80 (#0)
> GET /test/artists.php?artist=0+div+1+union%23foo*%2F*bar%0D%0Aselect%23foo%0D%0A1%2C2%2Ccurrent_user HTTP/1.1
> Host: 10.0.40.16
> User-Agent: curl/7.74.0
> Accept: */*
>
* Mark bundle as not supporting multiuse
< HTTP/1.1 403 Forbidden
< date: Thu, 23 Jun 2022 19:02:10 GMT
< server: envoy
< content-length: 0
Kibana
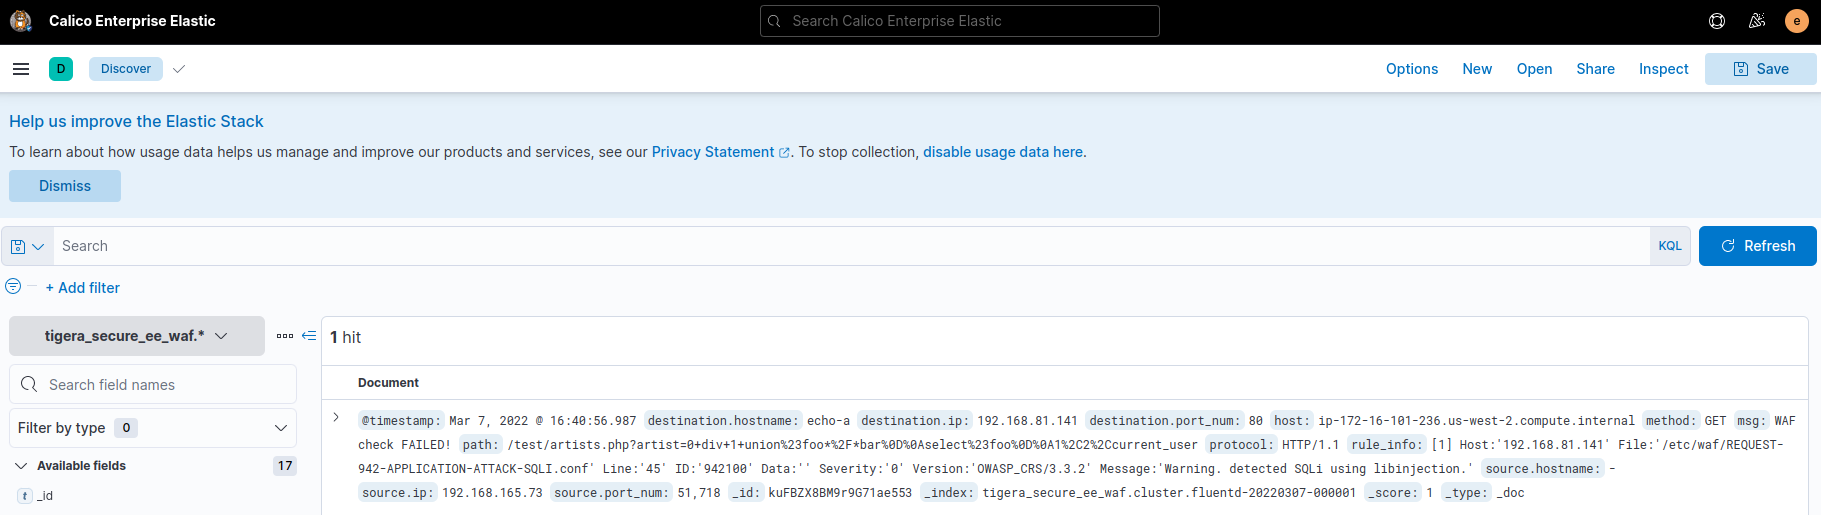
In Kibana you will have to create tigera_secure_ee_waf* index pattern. Instructions on how to create an index pattern can be found here.
Now view the WAF logs in Kibana by selecting the tigera_secure_ee_waf* index pattern. You should see the relevant WAF assessment from your request recorded:
Manager UI
Create a new Global Alert for WAF using Manager UI, or using standard YAML.
For example, we would like to trigger a Global Alert for SQL Injection attack specifically Rule ID 942100 as per custom version of Core Rule Set file that will "deny" all traffic instead of "block".
apiVersion: projectcalico.org/v3
kind: GlobalAlert
metadata:
  name: waf-new-alert-rule-info
spec:
  summary: 'WAF new waf-alert-942100'
  description: 'Test WAF Global Alert'
  severity: 1
  dataSet: waf
  period: 1m
  lookback: 1h
  query: '"rule_info" IN {"*942100*"}'
  threshold: 0
  condition: gt
Apply the YAML to your cluster using: kubectl apply -f test-demo-alert.yaml
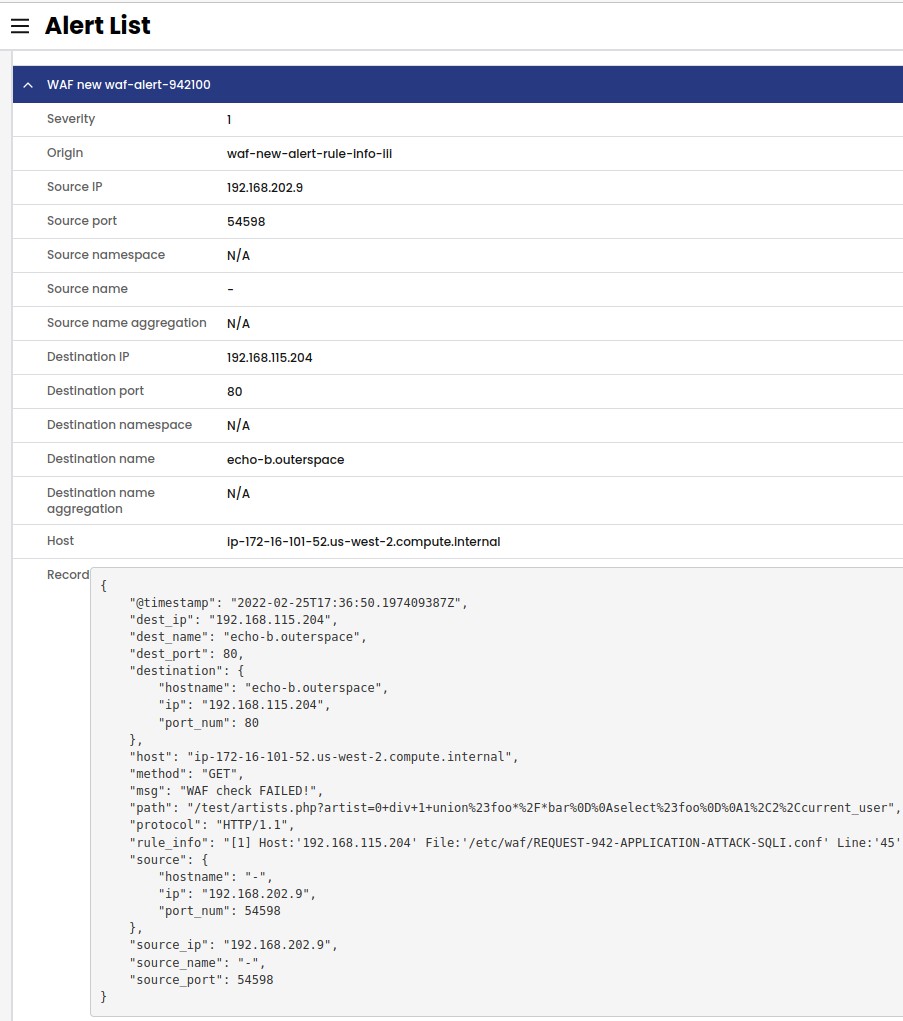
Now if a SQL Injection attack is detected for rule ID 942100, you will see the global alert in Manager UI, Activity, Alerts.